GE Electric Range Self Cleaning Instructions: A Comprehensive Guide (Updated 03/31/2026)
This guide provides detailed instructions for safely and effectively utilizing the self-cleaning feature on your GE electric range, as of today, March 31st, 2026, at 9:35 PM.
Understanding Your GE Electric Range’s Self-Clean Cycle
The self-clean cycle on your GE electric range is a high-temperature process designed to eliminate baked-on food residue within the oven cavity. Operating at temperatures significantly higher than normal cooking, typically exceeding 880°F (470°C), it transforms food soils into ash, which can then be easily wiped away after the cycle completes and the oven cools.
This isn’t burning, but a process called pyrolysis. GE ranges employ this technology to offer a convenient cleaning solution, minimizing manual scrubbing. However, understanding the cycle’s intensity is crucial for safety and optimal results. Different GE models may offer varying cycle lengths – from two to four hours – and soil level options (light or heavy) to tailor the cleaning process to your oven’s condition.
The self-clean cycle automatically locks the oven door for safety, preventing accidental opening during the high-temperature operation. It’s essential to familiarize yourself with your specific model’s features and limitations, as detailed in the owner’s manual, to ensure a successful and safe self-cleaning experience.
Safety Precautions Before Self-Cleaning
Prior to initiating the self-clean cycle on your GE electric range, several crucial safety precautions must be observed. First, ensure the kitchen is well-ventilated, as the process can generate odors and potentially some smoke. Remove any large pieces of food debris from the oven floor, as these can ignite and create excessive smoke.
Never manually add cleaning products or oven liners during the self-clean cycle; the high temperatures can release harmful fumes. Keep children and pets away from the oven during operation due to the extreme heat. Avoid touching the oven exterior during and immediately after the cycle, as surfaces will be very hot.
If anyone in your household has respiratory sensitivities, such as asthma, it’s advisable for them to avoid the area during self-cleaning. Disconnect any automatic timers or programmed cooking functions to prevent unexpected oven operation. Always review your range’s owner’s manual for model-specific safety guidelines before beginning the self-clean process.
Preparing Your Range for the Self-Clean Cycle
Thorough preparation is key to a successful self-clean cycle on your GE electric range. Begin by removing all cookware, bakeware, aluminum foil, and any temperature probes from within the oven cavity. Scrape away any large food spills or baked-on residue from the oven floor using a plastic or non-abrasive scraper. Avoid using harsh chemical cleaners, as they can release harmful fumes during the high-heat cycle.
Wipe up any loose debris with a damp cloth. Check the oven door seal for any damage or gaps; a proper seal is crucial for maintaining consistent temperatures. Ensure the cooktop surface is clear of any items that could melt or be damaged by radiant heat. Finally, familiarize yourself with the control panel and the self-clean function’s location and settings before starting the process.

A little preparation ensures a cleaner oven and a safer self-cleaning experience.
Removing Oven Racks and Accessories
Before initiating the self-clean cycle on your GE electric range, it’s crucial to remove all oven racks, broiler pans, and any other accessories from inside the oven cavity. The intense heat generated during self-cleaning can potentially warp or discolor these items. Most GE range racks are designed for easy removal; simply pull them forward and out of the oven.
Refer to your owner’s manual for specific rack removal instructions, as some models may have slightly different mechanisms; It’s generally recommended not to clean the racks during the self-clean cycle. Instead, wash them separately with warm, soapy water. Ensure all accessories are completely cool before handling.
Leaving items inside during the cycle can also create uneven heating and potentially damage the oven’s interior. Proper removal safeguards your oven components and ensures optimal cleaning performance.
Locking the Control Panel During Self-Clean
A vital safety feature of GE electric ranges is the automatic control panel lock that engages during the self-clean cycle. This prevents accidental operation or interruption of the high-temperature process. Once the self-clean cycle is initiated, the control panel will automatically lock, and a lock indicator will illuminate, typically displaying a padlock symbol.
Attempting to use the controls while locked will be unresponsive. Do not force any buttons or attempt to override the lock mechanism. The control panel will remain locked throughout the entire self-clean cycle, including the cool-down period.
This feature is designed to protect you and ensure the self-clean cycle completes safely and effectively. The panel will automatically unlock once the oven has cooled sufficiently and the cycle is fully finished. Never attempt to manually unlock the panel during operation.
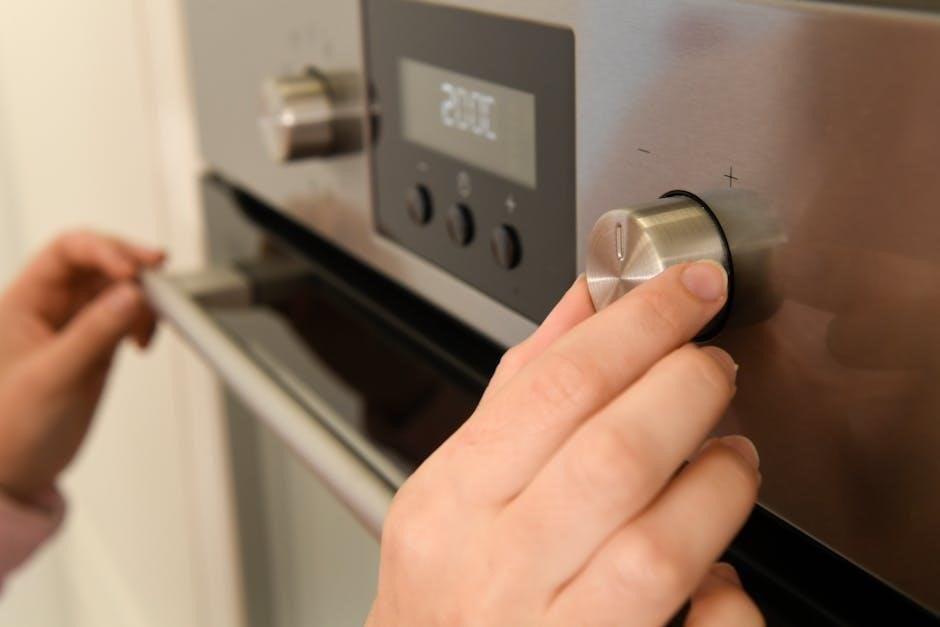
Selecting the Self-Clean Cycle Duration
GE electric ranges offer varying self-clean cycle durations to accommodate different levels of oven soil. Typically, you’ll find options for a standard 2-hour cycle and a heavy-duty 3-hour cycle. The selection process is usually straightforward, accessed through the oven’s control panel. Consult your specific model’s user manual for precise instructions, as button layouts can differ.
For lightly soiled ovens, the 2-hour cycle is generally sufficient. However, if your oven has accumulated significant baked-on grease or food residue, the 3-hour cycle is recommended for optimal cleaning. Consider the amount of buildup when making your selection.
Some newer GE ranges may offer an automatic cycle selection feature, which determines the appropriate duration based on the oven’s internal sensors. Always ensure the oven is properly prepared before initiating any self-clean cycle.
Light vs. Heavy Soil Options
GE electric ranges often provide a choice between “Light Soil” and “Heavy Soil” options within the self-clean cycle. Understanding the difference is crucial for efficient cleaning and energy conservation. The “Light Soil” setting is designed for ovens with minimal baked-on residue – perhaps spills cleaned up relatively quickly or infrequent use.
This option typically utilizes a shorter cycle duration and lower temperatures. Conversely, the “Heavy Soil” setting is intended for ovens with substantial buildup, like years of accumulated grease or charred food remains. It employs a longer, more intense cleaning process with higher temperatures.
Selecting the appropriate soil level prevents unnecessary energy consumption and ensures thorough cleaning. Using “Heavy Soil” on a lightly soiled oven won’t necessarily improve results, but will extend the cycle time. Always refer to your range’s manual for specific recommendations and cycle durations associated with each setting.
The Self-Clean Cycle Process – What to Expect
During the self-clean cycle, your GE electric range heats to extremely high temperatures – significantly hotter than during normal baking. This intense heat pyrolyzes food residue, essentially burning it off into ash. You’ll likely notice a burning smell, which is normal, though proper ventilation is essential (see related sections). The oven door automatically locks at the start of the cycle for safety, remaining locked until the oven cools sufficiently.
The cycle duration varies depending on the soil level selected (light or heavy) and your specific model. Expect the process to take between two and five hours. A clicking sound may be audible as the oven components expand and contract with the heat.
Once the cycle completes, the oven will enter a cool-down period. Do not attempt to open the door until it unlocks automatically. After cooling, a small amount of ash will remain, easily wiped away with a damp cloth.
Fumes and Ventilation During Self-Cleaning
The self-clean cycle produces fumes due to the high-temperature breakdown of food residue. While GE ranges are designed to manage these fumes, adequate ventilation is crucial for a safe and comfortable experience. Open windows in the kitchen and surrounding areas to create cross-ventilation. Simultaneously, activate your kitchen’s exhaust fan, setting it to the highest speed.
Individuals with respiratory sensitivities, such as asthma or allergies, should avoid the kitchen area entirely during the self-clean cycle and for a period afterward. Pets, particularly birds, are also highly sensitive to these fumes and should be removed from the home.
If strong or unusual odors persist even with ventilation, immediately stop the cycle and consult the troubleshooting section of this guide. Never leave the self-clean cycle unattended for extended periods, especially if you notice excessive smoke or fumes.
Cool Down Period After Self-Cleaning
Following the completion of the self-clean cycle, your GE electric range will undergo a significant cool-down period. The oven door will remain locked automatically until the internal temperature drops to a safe level – this is a crucial safety feature. Do not attempt to force the door open during this time, as it could cause severe burns.
The duration of the cool-down period varies depending on the cycle length selected (light or heavy soil) and the initial oven temperature. Typically, it can take anywhere from one to three hours for the oven to fully cool. A visual indicator, often a light or a message on the control panel, will signal when the door is safe to unlock.
Avoid placing any items inside the oven during the cool-down phase. Allow sufficient time for complete cooling before storing cookware or initiating any other oven functions.
Unlocking the Control Panel After Self-Cleaning
Once the cool-down period is complete and the oven door is unlocked, you may find the control panel remains locked. This is a standard safety precaution implemented by GE electric ranges after the self-clean cycle concludes. Unlocking the control panel is a straightforward process, though the exact method can vary slightly depending on your specific model.
Typically, you can unlock the control panel by pressing and holding the “Clear/Off” or “Cancel” button for a few seconds. Refer to your GE range’s user manual for the precise button combination for your model. Some newer models may require a specific sequence of button presses.
If the control panel doesn’t unlock after attempting these methods, consult the troubleshooting section of your manual or contact GE customer support for assistance. Do not attempt to disassemble or repair the control panel yourself.
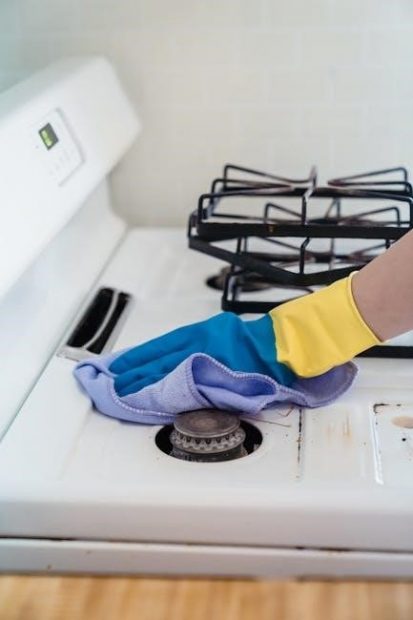
Cleaning After the Self-Clean Cycle
While the self-clean cycle significantly reduces oven grime, some residue will likely remain after completion. Once the oven has fully cooled and the control panel is unlocked, it’s time for a final cleaning touch-up. Begin by wiping down the interior with a damp cloth to remove the powdery ash left behind by the high-heat process.
Pay particular attention to the oven door, the area around the heating elements, and any areas where stubborn residue persists; A mild dish soap solution can be used for tougher spots, but avoid abrasive cleaners, as they can damage the oven’s interior surface.
Don’t forget to clean the oven frame and exterior. Finally, replace the oven racks and any accessories that were removed before the cycle. Regular post-self-clean maintenance will keep your GE range looking its best and functioning optimally.
Addressing Smoke During Self-Cleaning
Some smoke during the self-clean cycle is normal, particularly during the initial phase as food residue burns off at high temperatures. However, excessive smoke warrants attention. Ensure adequate ventilation by opening windows and using the range hood fan to help dissipate fumes. A small amount of smoke is usually harmless, but significant smoke could indicate a large buildup of grease or food particles.
If the smoking persists or becomes excessively thick, immediately press the “Cancel” button to halt the cycle. Allow the oven to cool completely before opening the door. Inspect the oven interior for any large, unburned food remnants and remove them.
Avoid restarting the self-clean cycle until the oven is thoroughly cleaned of these larger pieces. Recurring smoke issues may suggest a need for more frequent manual cleaning between self-clean cycles to prevent excessive buildup.
Troubleshooting Self-Clean Issues – Error Codes

When the self-clean cycle encounters a problem, your GE electric range may display an error code. These codes are designed to help diagnose the issue. Before attempting any repairs, always disconnect the power to the range at the circuit breaker. Consult your range’s user manual for a complete list of error codes and their corresponding meanings.
Common issues include a door lock malfunction, a faulty temperature sensor, or problems with the self-clean heating element. Some error codes may indicate a need to reset the range by turning off the breaker for several minutes. If an error persists after resetting, or if you are uncomfortable troubleshooting electrical components, it’s best to contact a qualified appliance repair technician.
Attempting to repair the range yourself without proper knowledge could void the warranty and pose a safety risk. Always prioritize safety and professional assistance when dealing with appliance malfunctions.
Common GE Range Self-Clean Error Codes & Solutions
Several error codes frequently appear during the self-clean cycle on GE ranges. F1/F2 often indicates a door lock issue – ensure the door is fully closed and latched. If the problem persists, the door lock assembly may need replacement. F3 signals a temperature sensor failure; a technician should inspect and replace the sensor. F4 points to a faulty self-clean heating element, requiring professional repair or replacement.
F5 suggests an electronic control board malfunction, a more complex issue needing expert diagnosis. F6 can indicate an overheating problem, potentially due to inadequate ventilation. Ensure the kitchen is well-ventilated during the cycle. Resetting the range (power cycle) can sometimes resolve minor errors.
Always consult your specific model’s manual for a comprehensive list and detailed solutions. If you’re uncomfortable addressing these issues, contact a certified GE appliance repair service for assistance. Safety is paramount when dealing with electrical appliances.
Preventative Maintenance to Optimize Self-Cleaning
Regular preventative maintenance significantly enhances the effectiveness of your GE range’s self-clean cycle. Before each use, wipe up large spills and food debris from the oven floor. This minimizes smoke and odors during cleaning. Periodically, inspect the oven door seal for damage or gaps; a compromised seal reduces cleaning efficiency and can be a safety hazard.
Every six months, manually clean the oven’s heating elements with a damp cloth (ensure the range is off and cool!). This removes buildup that can hinder performance. Avoid using harsh chemical cleaners, as they can damage the oven’s interior. Ensure proper ventilation in your kitchen during self-cleaning to dissipate fumes.
Finally, avoid placing aluminum foil or other materials inside the oven during the self-clean cycle, as they can cause damage. Consistent care extends the life of your range and optimizes the self-cleaning function.
Self-Cleaning Alternatives – Manual Cleaning Methods
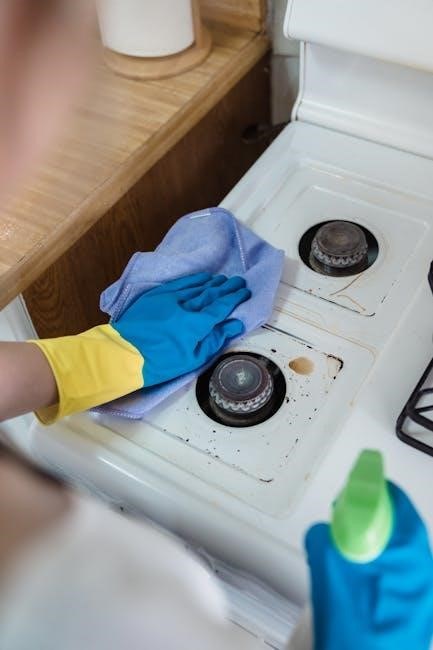
While the self-clean cycle is convenient, several effective manual cleaning methods exist for your GE electric range. A baking soda paste (baking soda and water) applied to stubborn stains, left overnight, then scrubbed, works wonders. For lighter messes, a solution of dish soap and warm water is often sufficient.
Vinegar, diluted with water, can cut through grease and grime. Spray it on, let it sit, and wipe clean; For burnt-on food, create a paste of salt and water, apply, and scrub gently. Always test any cleaning solution in an inconspicuous area first.
Remember to wear gloves during manual cleaning. Avoid abrasive cleaners that can scratch the oven’s interior. Manual cleaning requires more effort but offers greater control and avoids the high temperatures and potential odors of the self-clean cycle. It’s a great option for frequent, lighter cleaning tasks.
GE Range Self-Clean Cycle FAQs
Q: How often should I use the self-clean cycle? A: Typically, every 3-6 months, or as needed based on usage. Frequent use can shorten the oven’s lifespan.
Q: Can I interrupt a self-clean cycle? A: Yes, but it’s not recommended. Pressing the ‘Cancel’ button will stop it, but the oven will remain locked until cool.
Q: Why does my oven smell during self-cleaning? A: Burning food residue and protective coatings release odors. Ensure adequate ventilation.
Q: Is smoke normal during self-cleaning? A: A small amount is possible, but excessive smoke indicates a significant buildup of food debris.
Q: What if the control panel remains locked after the cycle? A: Allow ample cool-down time. If it persists, consult the troubleshooting section or a technician.
Q: Can I use oven cleaners during the self-clean cycle? A: Absolutely not! This is extremely dangerous and can damage your oven.